

Dear GAOMON customers,
When the cursor deviates, calibration is not always the effective method. This is because of different offset distances caused by different reasons. Therefore, you should know two definitions. One is offset in the normal range; the other out of the normal range.
What is the normal range? It is an acceptable offset distance which is offset+/- 3mm at the edges and +/- 0.5mm in the center.
While out of the range, you should fix it by adjusting display settings, including PD1560 and the computer monitor. For example, when you draw on PD1560, the mouse pointer is on the computer monitor, not under the stylus nib, it is caused by inappropriate display settings. At this time, you should adjust the offset by resetting displays.
PS: if you were a left-hander, please go
How to Fix Cursor Offset in Left-handed Mode of PD1560 in Mac OS and
How to Fix Cursor Offset in Left-handed Mode of PD1560 in Windows
To Calibrate
When the cursor offset is out of the normal range, you can try to calibrate it by the following steps firstly.
- Open GAOMON driver interface and go Work Area to select the ‘Calibration’ button
- There are three ways for your reference while calibrating. Please try them all until the cursor gets normal.
Method 1: Keep the stylus vertical to the display of PD1560.
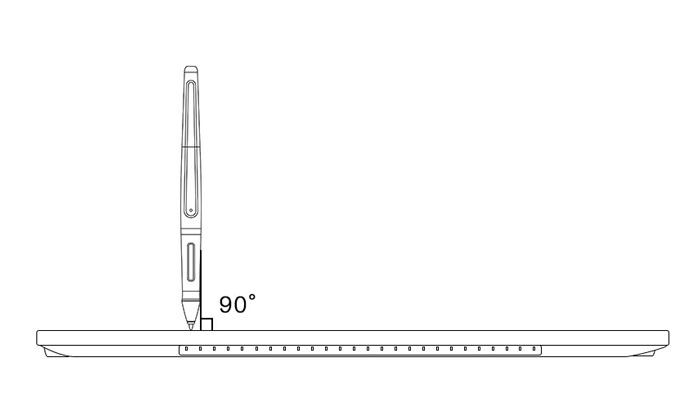
Keep the stylus vertical to PD1560 while calibrating
Method 2: hold the stylus as your natural grip while calibrating
Method 3: click the position away from the red center at the same offset distance. Do not click the red center but click the position as the same distance as the offset distance away from the cursor.
For example, if cursor deviated left 5mm from the nib, click the position right 5mm away from the red center, like the figures show.
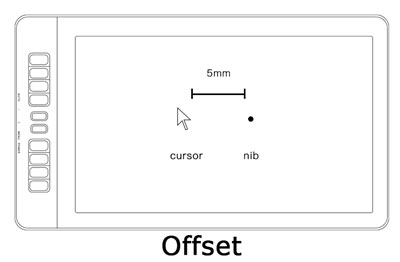
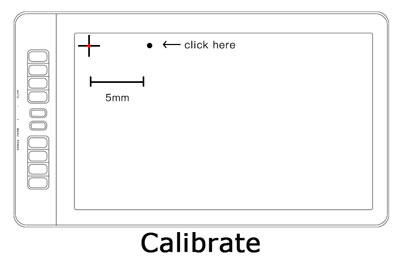
——【left】the cursor deviated left 5mm from the nib. ——【right】click the position right 5mm away from the red center and keep the stylus vertical.
Try to calibrate by keeping the stylus vertical to the display of PD1560. If it worked not perfectly, please try to calibrate by holding the stylus in your natural grip.
Offset only in drawing software, not on the desktop.
When cursor offset only happens in drawing software, but not on the desktop or other programs, please re-install GAOMON driver by following the correct driver installation instruction, and pay attention to these important steps that you must do.
- COMPLETELY uninstall all the existing drivers before re-install, including other brand drivers, for example, Wacom drivers. IMPORTANT!
- Right-click the driver setup file with extension name ‘.exe’ and choose “run as administrator”
- NOTE! DO NOT change the installation path! Just install it as the default path in the disk C.
After reinstallation, please check whether the cursor moving is in good condition or not.
If this solution failed to help you, please feel free to contact GAOMON SUPPORT TEAM and submit the following IMPORTANT information in your description:
- Version of the drawing program when the cursor offset happened;
- Version of the GAOMON driver when the cursor offset happened;
- Which computer system (Windows or Mac?) and its version you are using when the cursor offset happened.
- Where the cursor offset happened:here is only in drawing software.
Offset at anywhere, not only in drawing programs.
Select one method from the next two, duplicate and extend mode, based on your preferred mode.
In Windows Duplicate Mode
If you preferred to work under Duplicate Mode, please follow this solution.
- Simultaneously press the ‘window’ + ‘P’ key on your keyboard.
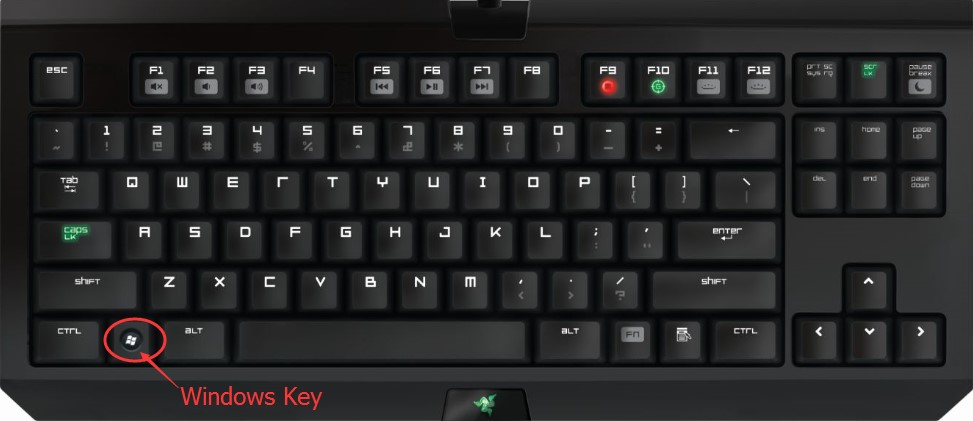
Simultaneously press the ‘window’ + ‘P’ key on your keyboard
- Choose Duplicate mode.
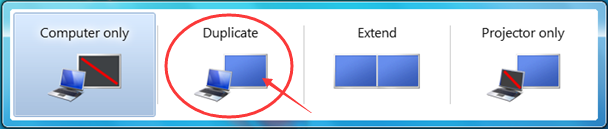
select Duplicate in the red circle
- Open the ‘Computer’ and click ‘Open Control Panel’.
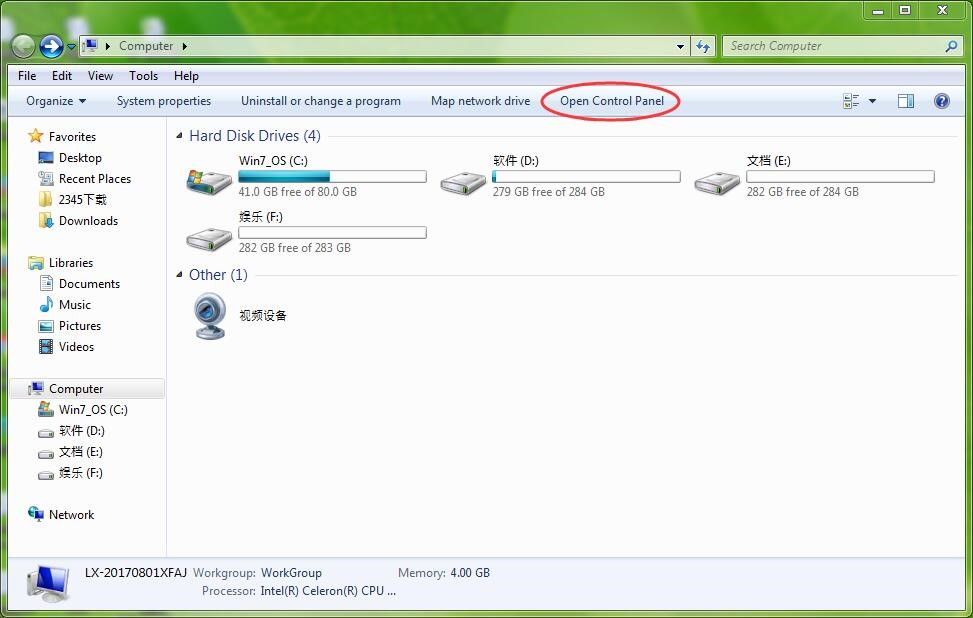
The control panel of ‘computer’
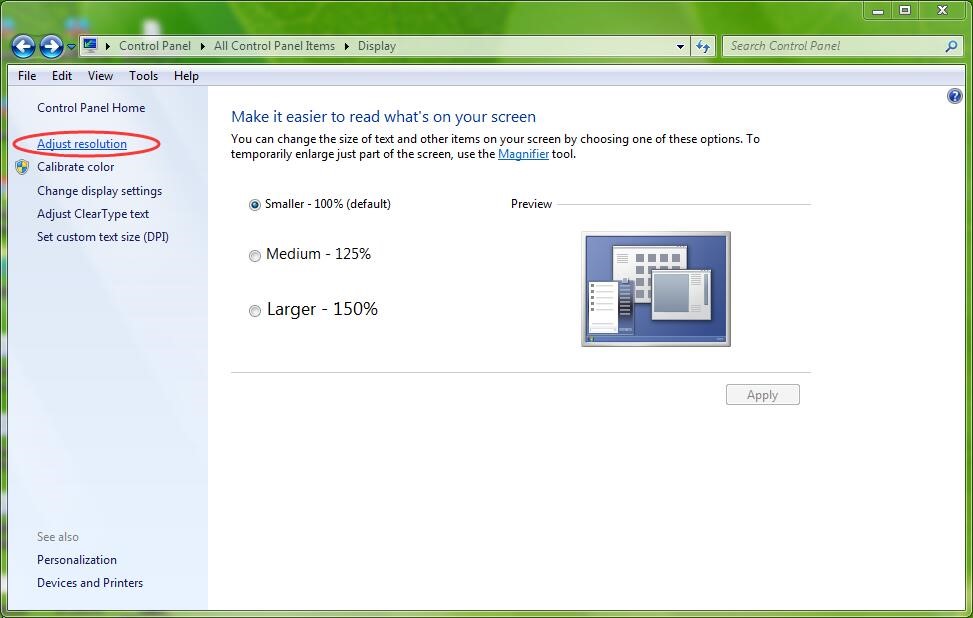
- Find the tab ‘Display’ (showing in the fig.) and click it.
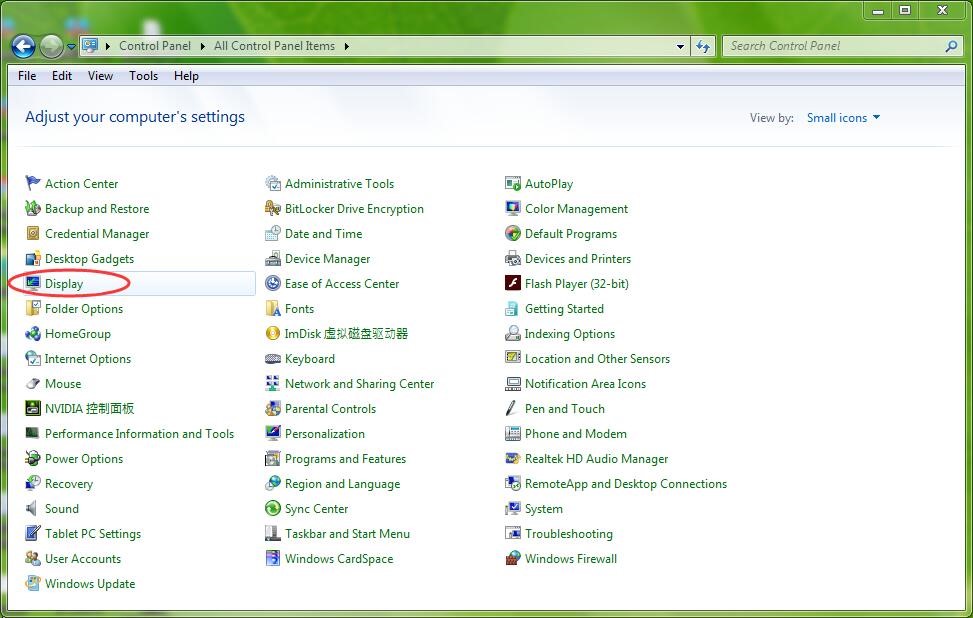
To set display’s size
- Tick “Smaller-100%” and click ‘Apply’.
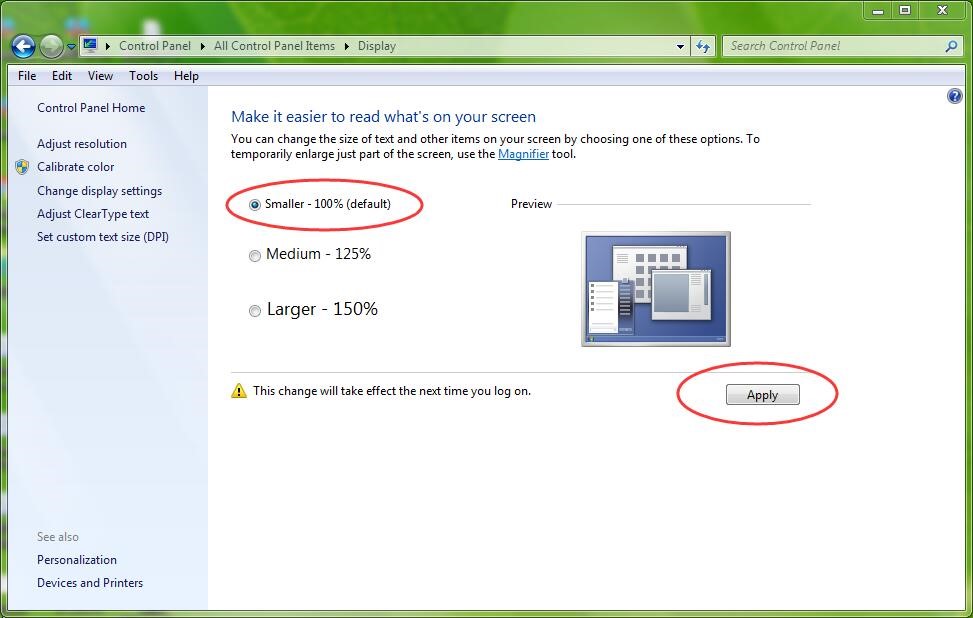
Tick “Smaller-100%” and click ‘Apply’ while resolving GAOMON offset issue
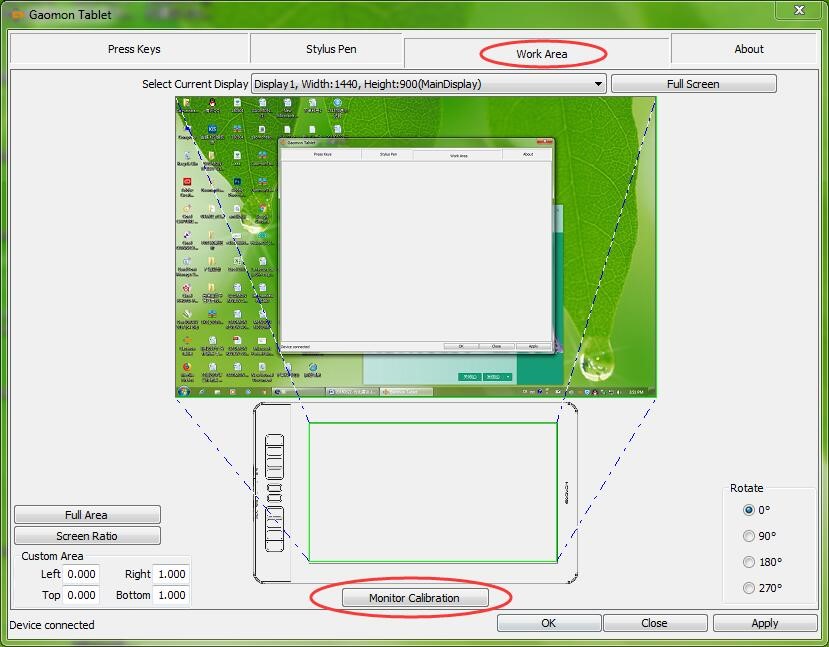
- Open GAOMON driver interface and click “Work Area” and then “Monitor Calibration”.
 There are three ways for your reference while calibrating. Please try them all until the cursor gets normal.
 - Method 1: Keep the stylus vertical to the display of PD1560.
Keep the stylus vertical to PD1560 while calibrating
Method 2: hold the stylus as your natural grip while calibrating
Method 3: click the position away from the red center at the same offset distance. Do not click the red center but click the position as the same distance as the offset distance away from the cursor.
For example, if cursor deviated left 5mm from the nib, click the position right 5mm away from the red center, like the figures show.
——【left】the cursor deviated left 5mm from the nib. ——【right】click the position right 5mm away from the red center and keep the stylus vertical.
- Try to calibrate by keeping the stylus vertical to the display of PD1560. If it worked not perfectly, please try to calibrate by holding the stylus in your natural grip.
If this solution failed to calibrate the cursor, please feel free to contact GAOMON SUPPORT TEAM. Please tell us the results that you have gotten from this resolution. We’re always here for you.
In Wins Extend Mode
If you preferred to work under Extend Mode, please follow this solution.
- Simultaneously press the ‘window’ + ‘P’ key on your keyboard.
Simultaneously press the ‘window’ + ‘P’ key on your keyboard
- Choose Extend mode.
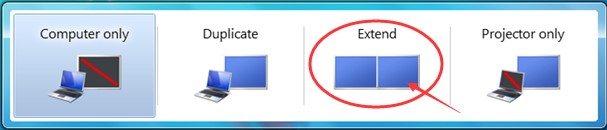
select Extend in the red circle
- Open ‘My Computer’ and click ‘Open Control Panel’.
The control panel of ‘computer’
- Find the item ‘Display’ (showing in the fig.) and click it.
To set display’s size
- Tick “Smaller-100%”.
Tick “Smaller-100%” and click ‘Apply’ while resolving GAOMON offset issue
- Click “Adjust resolution” to set the resolution of GAOMON PD1560 in the computer Control Panel
- Set the item ‘Display’ as ‘PD1560’, set the item ‘Resolution’ as 1920*1080 and click ‘Apply’ to save the changes.
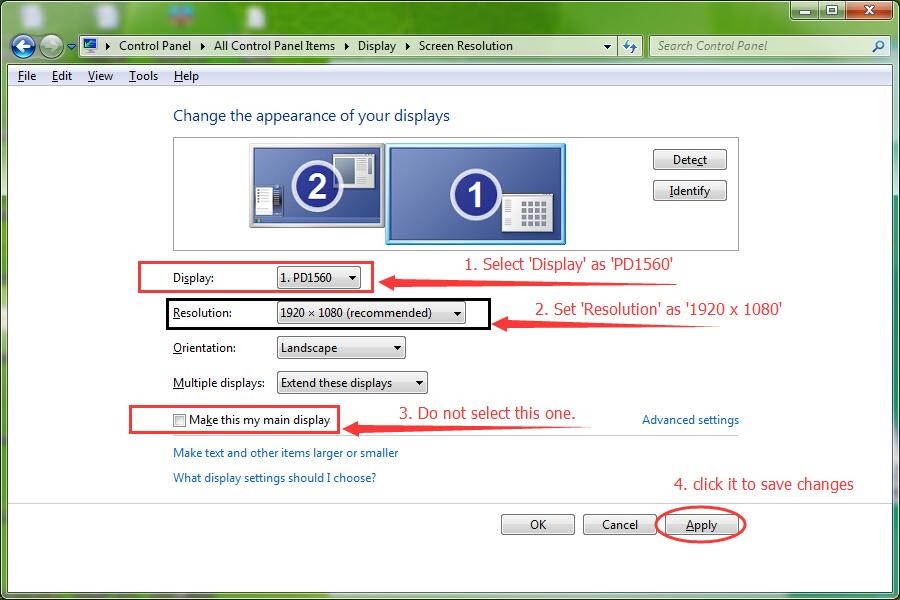
Do not tick ‘Make this my main display’.
Note! Before click ‘Apply’, we didn’t tick ‘Make this my main display’, so your main display is still the computer monitor. Your main display will be GAOMON PD1560 if you ticked this option. This is important in the later steps to recognize which one is GAOMON display.
- Open the GAOMON Driver interface and click “Work Area”
- Click the drop-down menu of ‘Select Current Display’. There are three elements: Display 1, Display2, and All Display.
- By previous steps, we’ve set the resolution of PD1560 as 1920 x 1080. So here, Display 2 is the display of PD1560 while Display 1 is the computer monitor.
- Here we should ‘Select Current Display’ as the display of PD1560, not the computer monitor.
- Select the item ‘Select Current Display’ as ‘PD1560 display’ and click ‘Apply’.
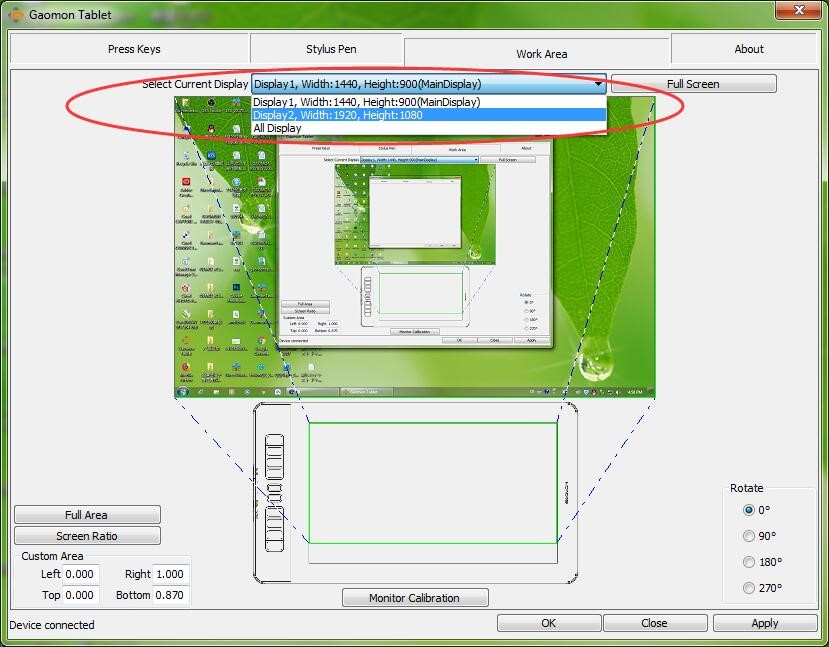
Make sure it is NOT ‘All display’ or ‘computer monitor’.
For example, here in this picture, Display 1, the Main Display with Width1440, Height 900 is the computer monitor, because in the previous step when we set the resolution of the PD1560 display, we didn’t tick ‘Make this my main display’. So the main display is still the computer monitor. And Display 2, with Width 1920, Height 1080, is the GAOMON PD1560 display. So here selects ‘Display 2’ as ‘Current Display’.
- Now please check whether the cursor moving is in good condition. If not, try to calibrate through GAOMON driver.
- Open the GAOMON driver, then click ‘Work Area’ and ‘Monitor Calibrate’.
There are three ways for your reference while calibrating. Please try them all until the cursor gets normal.
Method 1: Keep the stylus vertical to the display of PD1560.
Keep the stylus vertical to PD1560 while calibrating
Method 2: hold the stylus as your natural grip while calibrating
Method 3: click the position away from the red center at the same offset distance. Do not click the red center but click the position as the same distance as the offset distance away from the cursor.
For example, if cursor deviated left 5mm from the nib, click the position right 5mm away from the red center, like the figures show.
——【left】the cursor deviated left 5mm from the nib. ——【right】click the position right 5mm away from the red center and keep the stylus vertical.
Try to calibrate by keeping the stylus vertical to the display of PD1560. If it worked not perfectly, please try to calibrate by holding the stylus in your natural grip.
- Now check the cursor whether it is in the normal range.
About Donation Plan and Discount of PD1560 :
If this solution failed to help you, please feel free to contact GAOMON SUPPORT TEAM. Please tell us the results that you have gotten from these resolutions. We’re always here for you.
Leave a Reply