

#ISSUE:
This issue of no pen pressure ONLY happened in Adobe Photoshop Drawing software.
SOLUTION:
This solution is based on Adobe Photoshop CC 2017 and Windows 7 ultimate system (64 bit). Others resemble.
Method 1: re-install the tablet driver
- Uninstall the existing driver, including other brands, such as Wacom’s
- Close all drawing programs and anti-virus software
- Download a new driver from GAOMON Driver Center
- Run the driver as administrator after unzipping the installation package
- Do not change its default installation path
- After installing it, check photoshop whether its pen pressure works or not. If not, try to install the driver again. You may try to re-install it several times.
Method 2: check or uncheck ‘Enable Windows Ink’
- Open GAOMON Driver interface and click ‘Stylus pen’
- Go to see the box ‘Enable Windows Ink’ in the lower left corner, marked in the circle ‘2’
When the box is not marked with a check, tick it as the same as the picture1.

Picture 1: check the box of ‘Enable Windows Ink’
Or, when the box is marked with a check, deselect the check as the same as the picture 2.
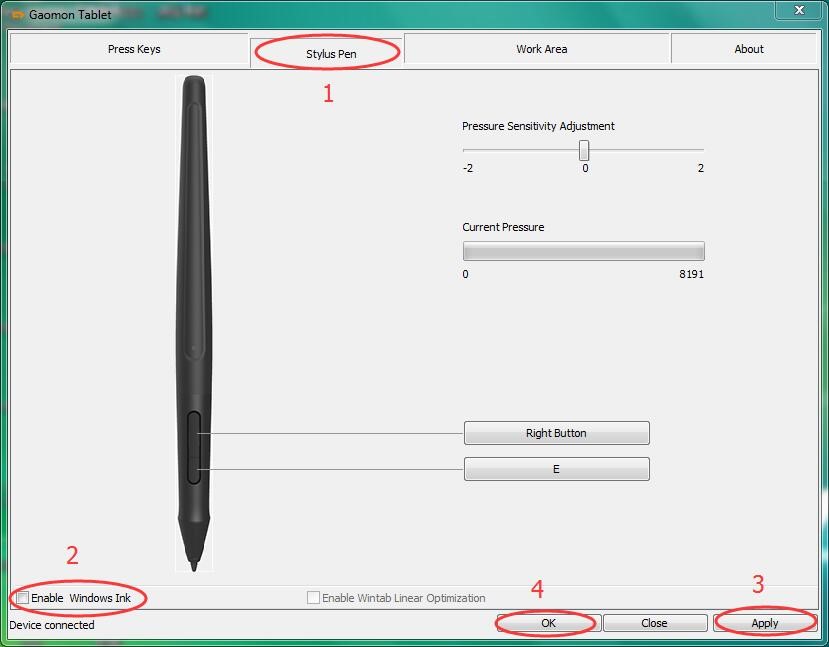
Picture 2: Deselect box of ‘Enable windows ink’
- Click ‘Apply’ and then ‘OK’ to save the changes. Check whether your photoshop has pen pressure or not.
Recommend you to try this method several times. Select, deselect, select, deselect. If still no pen pressure, please try the next solution.
Method 3: set pen press in Photoshop
- Open Photoshop and create a new canvas after installing the new driver;
- To prompt out the ‘Brush’ box by pressing ‘F5’ key on your keyboard;
- Tick Shape Dynamics and Smoothing as marked in the picture;
- Tick Transfer to show the ‘Control’ box as marked in the picture;
- Choose ‘Pen Pressure’ from the drop-down list of ‘Control’ box.
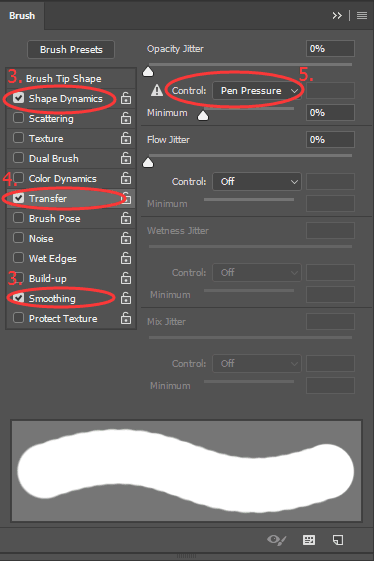
These red circles with numbers are responsive steps from step 3 to 5.
Method 4: re-install Photoshop program
Method 5: add a missing file back into Photoshop
- Create a PSUserConfig.txt file and type ‘#Use WinTab UseSystemStylus 0’ in it
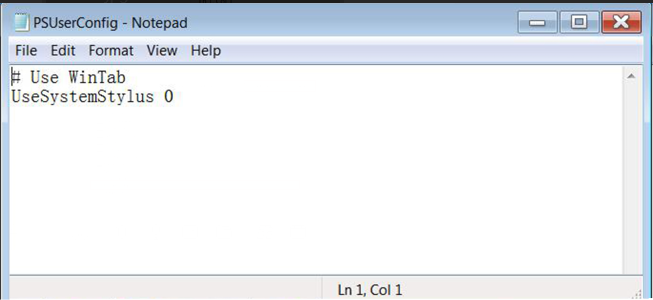
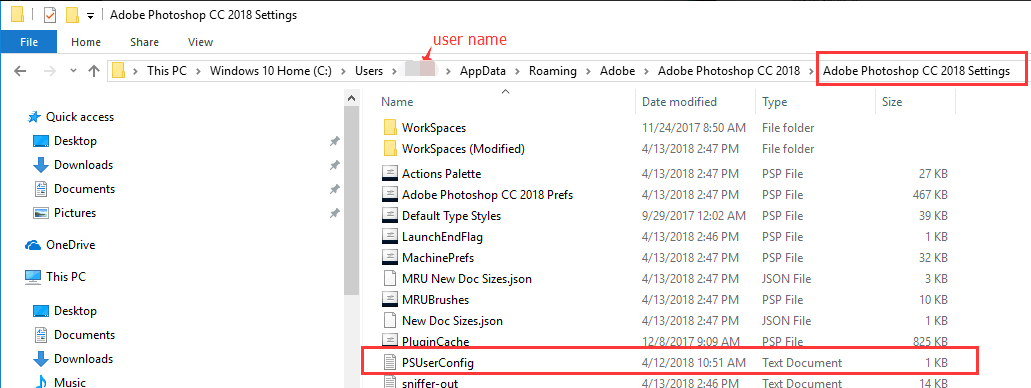
- Save this file in Adobe Photoshop CC 2018 Settings. Here is its path: C:\Users*Username*\AppData\Roaming\Adobe\Adobe Photoshop CC 2018\Adobe Photoshop CC 2018 Settings\
- Check whether your photoshop has pen pressure or not. If not, try Method 3 several times.
Related Posts:
How to Do When Cursor Delays in Photoshop
Brush, Line, Rectangle, Polygon etc. Tools Not Work as Normal in Photoshop
If this solution failed to help you, please feel free to contact us. We’re always here for you. You can submit your issue from here: GAOMON SUPPORT TEAM.
Leave a Reply