In Krita, when your tablet pen didn’t work or you didn’t know how to set pen pressure, you can consult this solution. The button arrangement of Krita is almost the same in the macOS system as in Windows. Therefore, here only takes the Windows system as an example. This solution based on:
OS: Windows 7
Krita version: 4.1.0
GAOMON driver version: 13.15.19
- Open Krita and create a new canvas
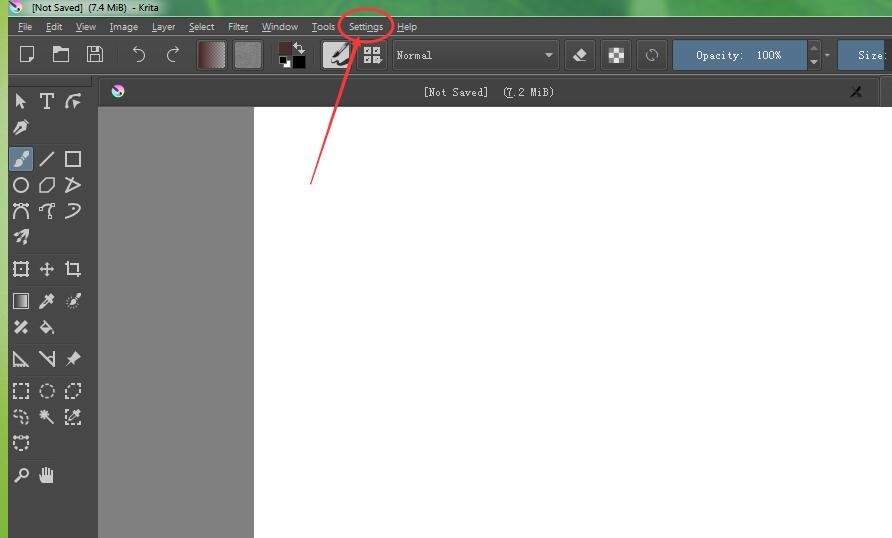
- Click ‘Settings’ menu –> select ‘configure toolbars’ from the drop-down menu to bring up the dialog box ‘configure toolbars’
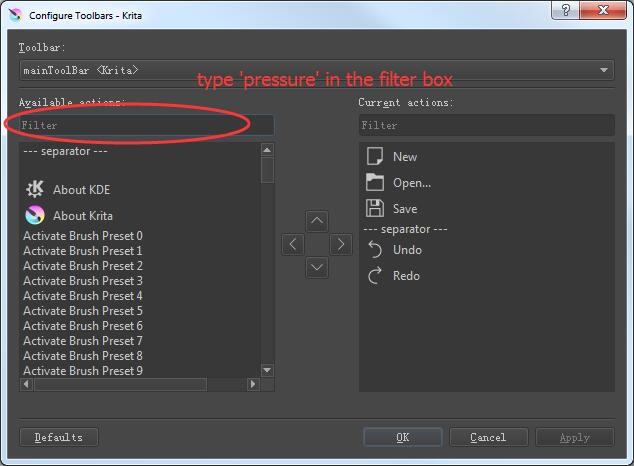
- Type ‘Pressure’ in the filter box of ‘Available actions’.
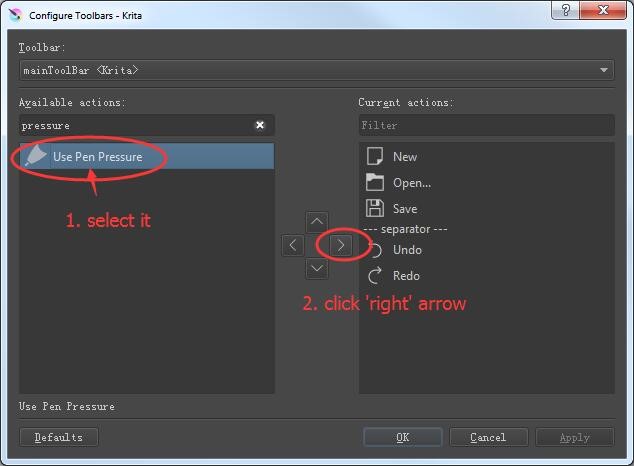
- Click ‘Use Pen Pressure’ and then click the right arrow circled as this picture to move ‘Use Pen Pressure’ into the box of ‘Current actions’.
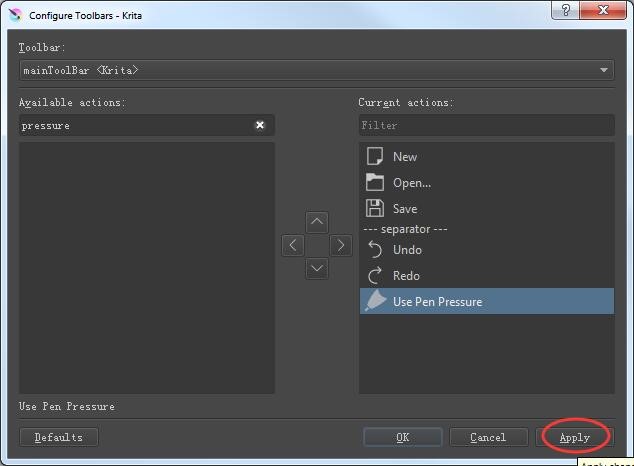
- You can see that ‘Use Pen Pressure’ is on the list of ‘Current actions’. Now click ‘Apply’ button to save this change.
- The icon of ‘Use Pen Pressure’ appears in the toolbar. If it didn’t appear there, please do as following steps.
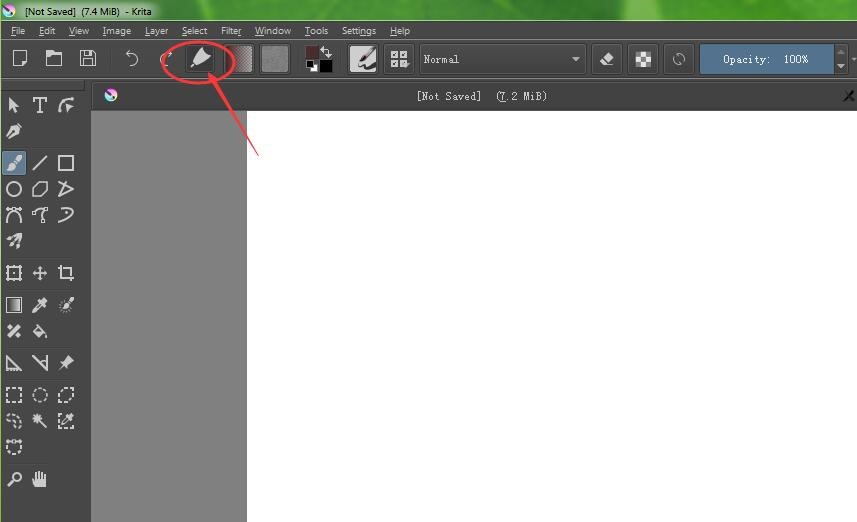
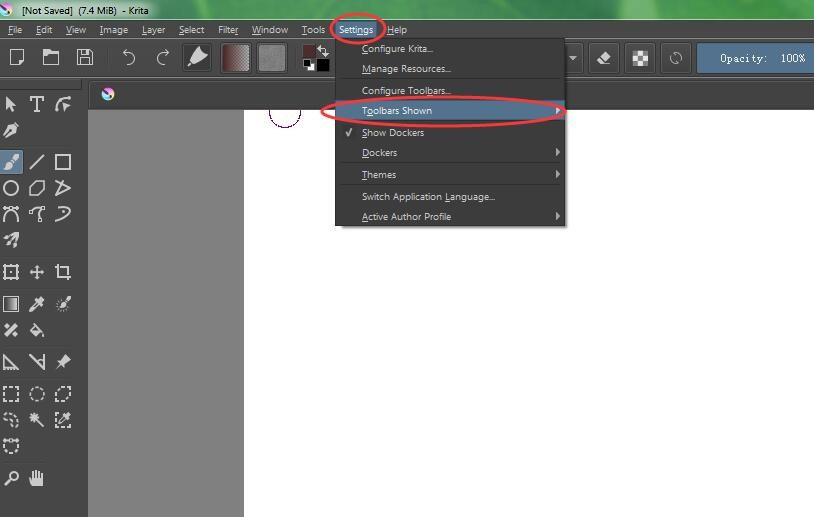
- Click ‘Settings’–> ‘Toolbars Shown’ –> select ‘File’ to show the icon of ‘Use Pen Pressure’
- When an ‘x’ under the right corner of the icon of ‘Use Pen Pressure’, your stylus will have no pen pressure. Click this icon and make it change to
 without an ‘x’, the stylus will get pen pressure again.
![]()
Related Posts:
No Pen Pressure in Krita – Mac OS?
Solutions for No Pen Pressure When Drawing
If this solution failed to help you, please feel free to contact us. We’re always here for you. You can submit your issue from here: GAOMON SUPPORT TEAM.

can someone tell me why it doesn’t work for me, even if follow these steps?
Hi Laura Renner, sorry for the inconvenience and late reply. Hope you’ve already got contact with our support team and have solved this issue. Now, I’ve transported your issue to our support team who will contact you soon. Thank you.